 Telegram
 WhatsApp
 Discord
 ask@voicehotkey.com
 Download for iPhone


Install & use VoiceHotKey on iPhone
VoiceHotKey on iPhone lets you type with your voice in any app. Press the mic, speak & the transcribed text drops into any app you’re writing into — WhatsApp, iMessage, Telegram, Slack, Discord, Mail, Notes, Safari, anywhere a keyboard appears.
The first-time setup takes about two minutes: install, sign in by email, then turn on the keyboard in iOS Settings.
1. Install from the App Store
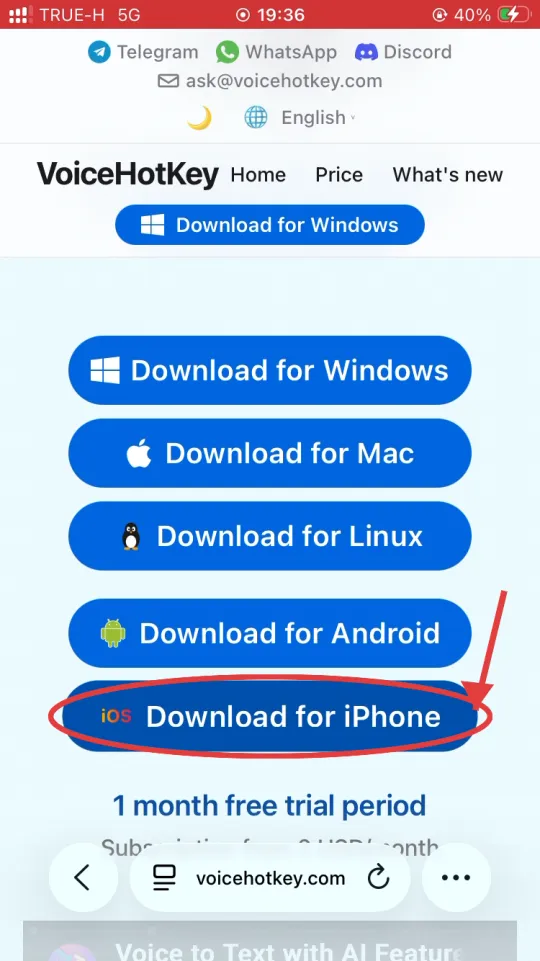
Open voicehotkey.com in Safari on your iPhone & tap Download for iPhone. The link goes straight to the right App Store listing.
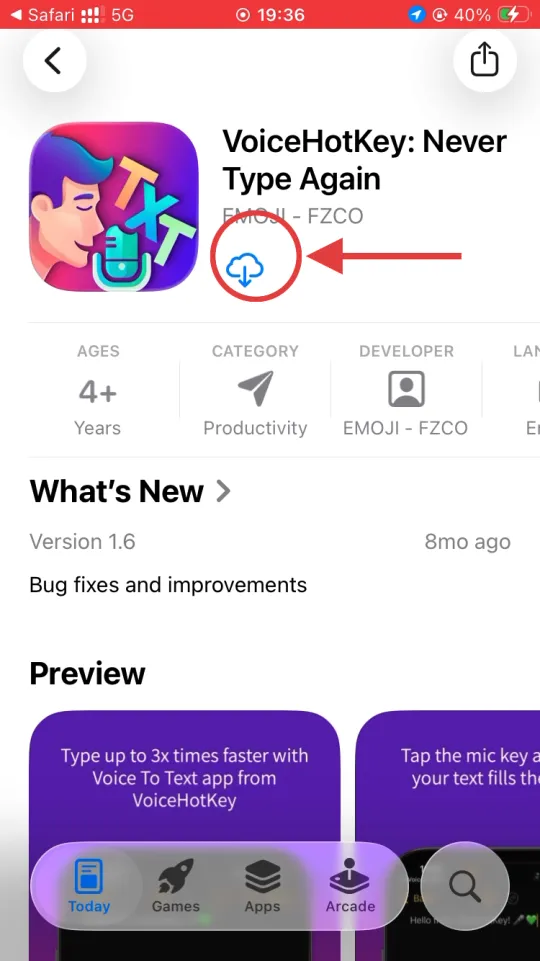
The App Store opens directly on VoiceHotKey: Never Type Again. Tap the cloud-download icon (or Get, if you’ve never installed it on this Apple ID) to start the install.
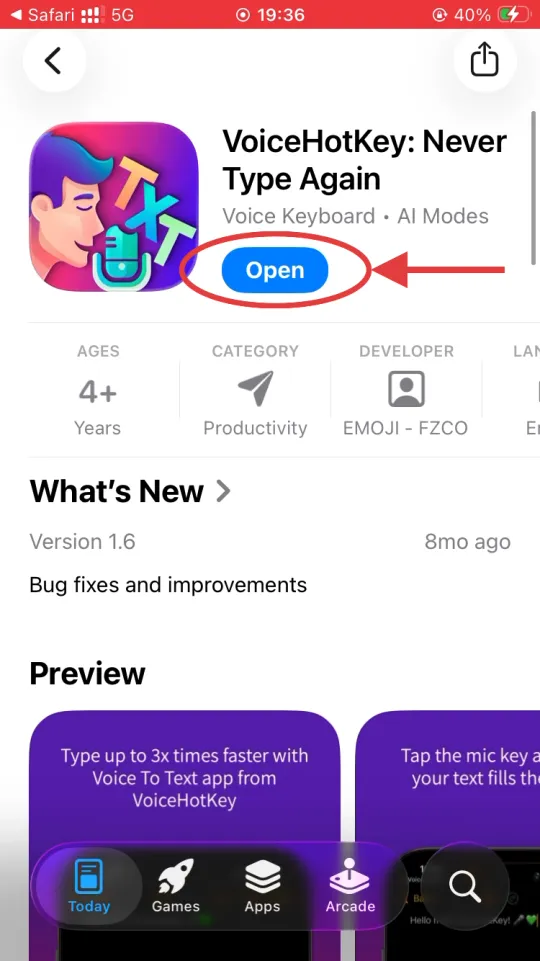
When the download finishes, the Get button turns into Open — tap it to launch VoiceHotKey for the first time.
2. Sign in with your email
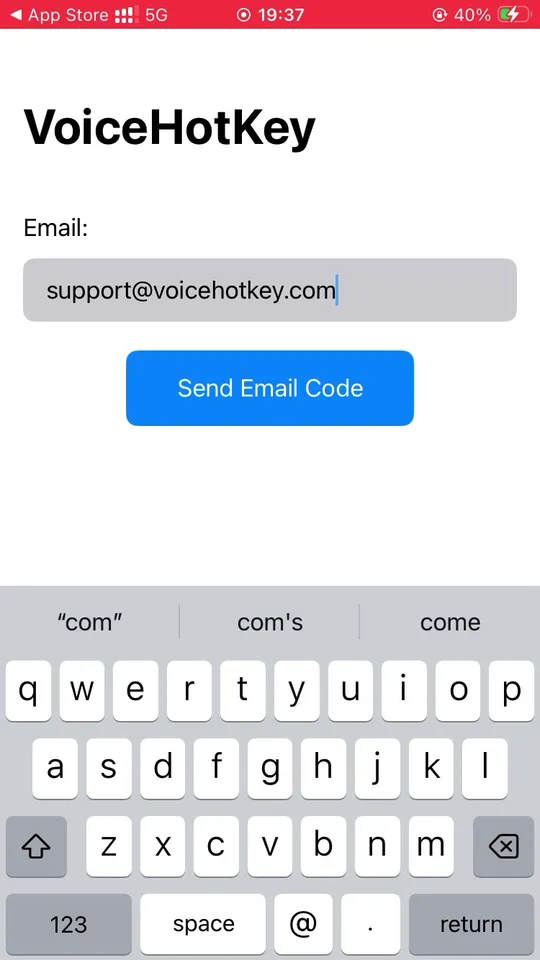
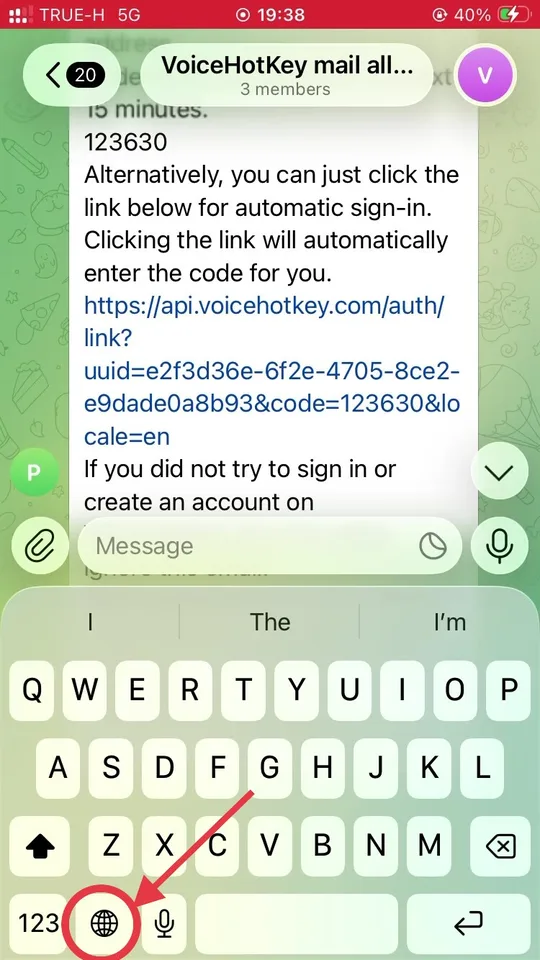
Open VoiceHotKey. On the first screen, type your email address & tap Send Email Code.
A 6-digit code arrives in your inbox within a few seconds. The email also contains an automatic sign-in link — tapping it on the same phone fills in the code for you. Enter the code & tap Log in.

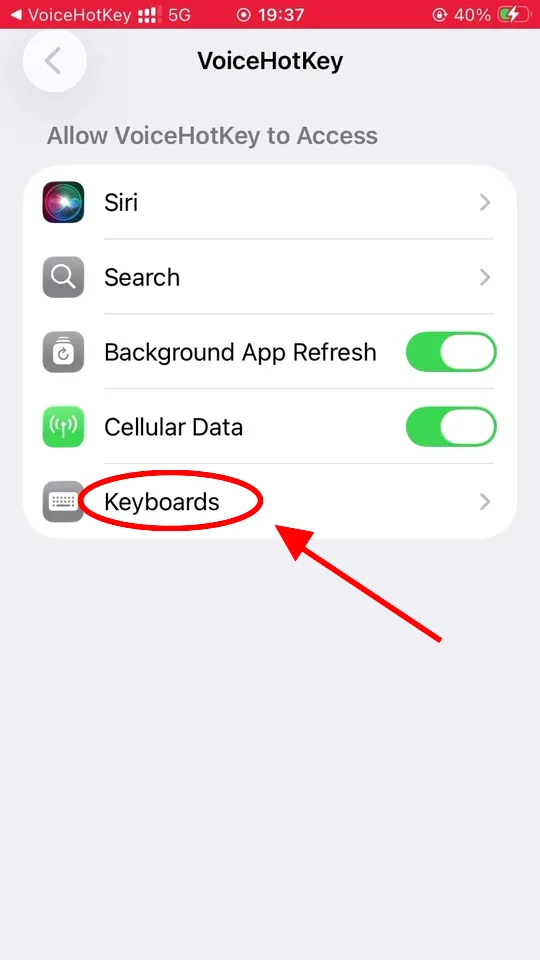
3. Enable the keyboard in iOS Settings
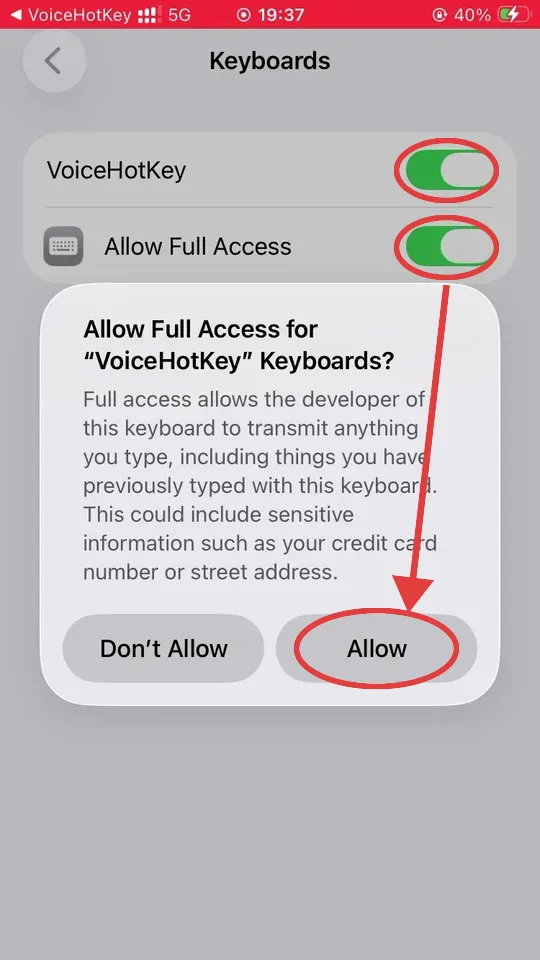
iOS won’t let any app act as a keyboard until you explicitly turn it on. Open Settings → VoiceHotKey & you’ll see the access screen below. Tap Keyboards, then enable VoiceHotKey & turn on Allow Full Access.
When you flip Allow Full Access, iOS shows a strongly-worded warning. Don’t worry — it’s the same dialog every third-party keyboard triggers. Full Access is required so VoiceHotKey can send the transcribed text into the field you’re typing in & reach our speech-to-text service. The app does not read or store anything you type with the system keyboard. Tap Allow to continue.
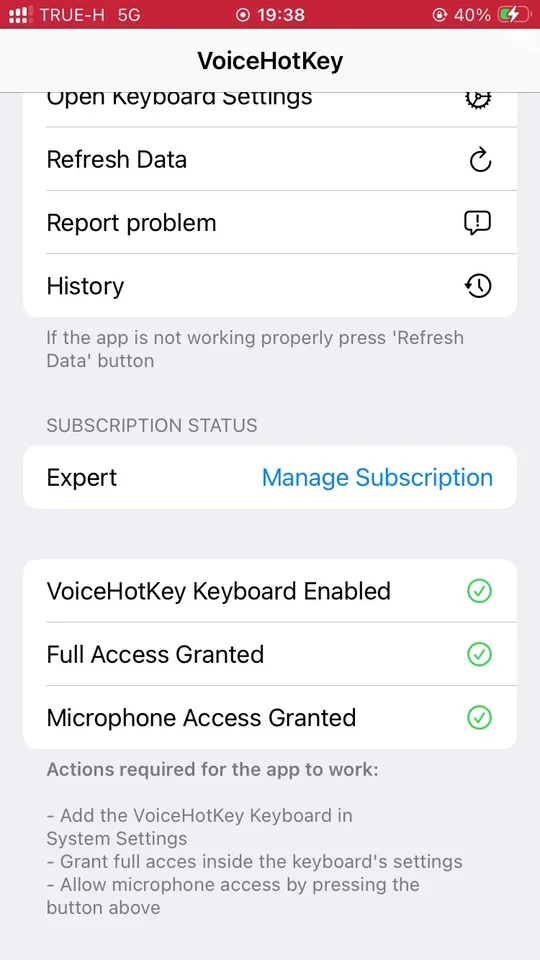
Back in the VoiceHotKey app, scroll down to the status block. The three checks must all be green before the keyboard works:
- VoiceHotKey Keyboard Enabled — turned on under Settings → VoiceHotKey → Keyboards.
- Full Access Granted — toggled on the same screen.
- Microphone Access Granted — tap the red microphone row & approve the permission prompt (next step).
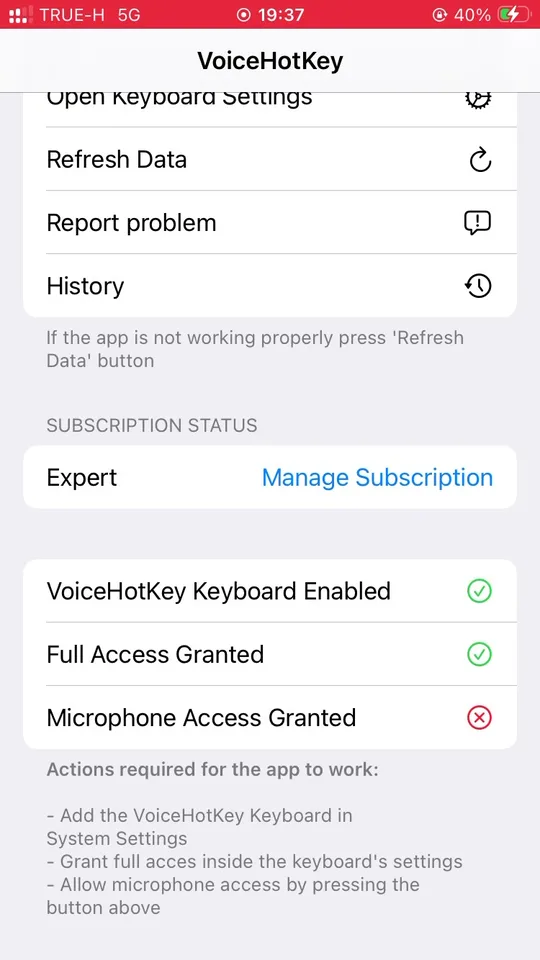
If anything stays red, follow the Actions required list at the bottom of that screen. Tapping Open Keyboard Settings at the top of the app jumps straight to the right iOS page.
4. Allow microphone access
Tap the red Microphone Access Granted row. iOS shows a one-time permission dialog — tap Allow. (If you accidentally tap Don’t Allow, you can re-enable mic access later in Settings → VoiceHotKey → Microphone.)
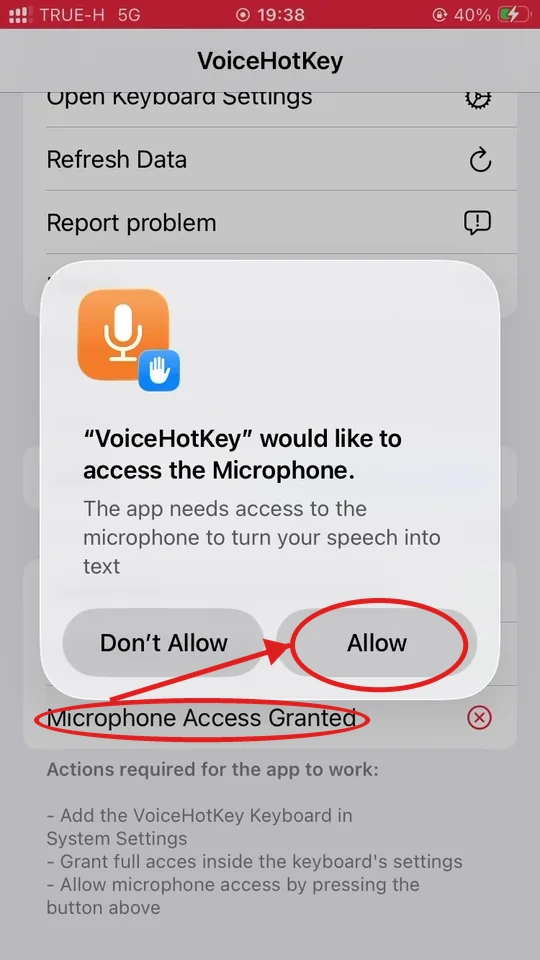
After you allow it, all three rows turn green & the Actions required notice disappears. The keyboard is ready to use.
5. Pick your dictation languages
Before you dictate for the first time, open the VoiceHotKey app & enable the languages you actually speak. The default is English only — if you speak another language without enabling it, the transcription will come out in English instead of the language you spoke.
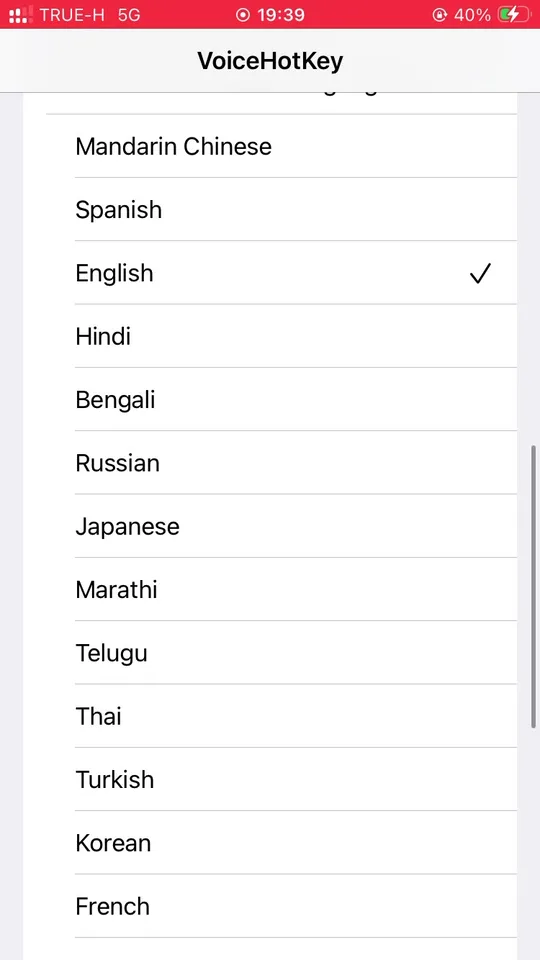
Scroll to the options block & tap Choose Voice to Text Languages. Toggle every language you want recognised. Multiple languages can be active at once & VoiceHotKey will detect which one you’re speaking on each recording.
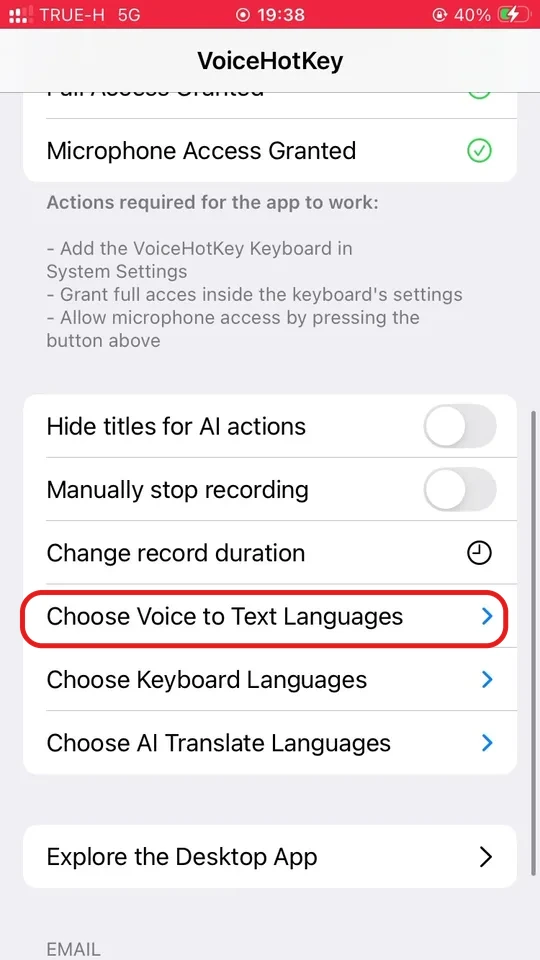
The same options block also lets you tweak:
- Choose Keyboard Languages — which typing languages the VoiceHotKey keyboard supports.
- Choose AI Translate Languages — target languages for the built-in translate action on the keyboard’s suggestion bar.
6. Switch to the VoiceHotKey keyboard
Open any app where you’d normally type and bring up the system keyboard. In the bottom-left corner you’ll see the 🌐 globe icon: tap it once to cycle to the next keyboard, or hold it to pick VoiceHotKey from the list.
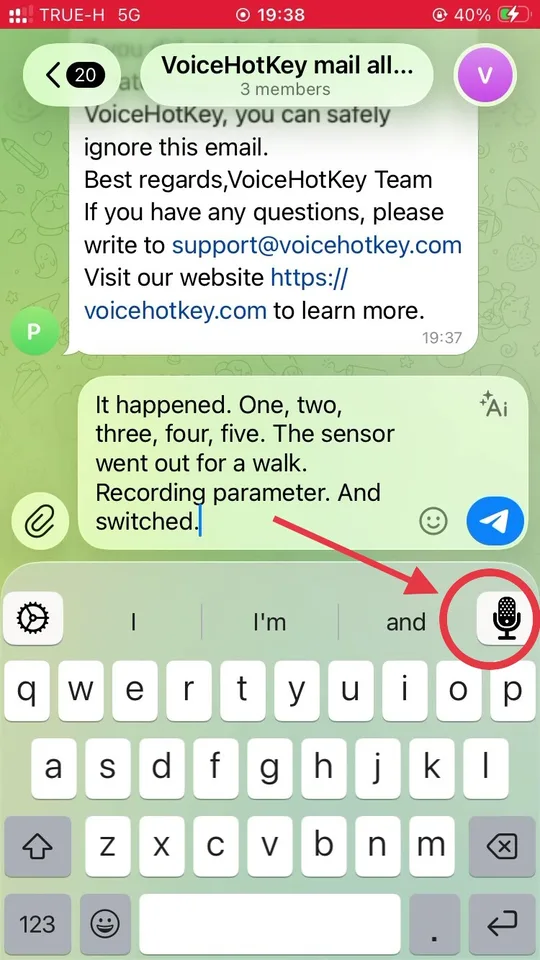
7. Tap the mic to dictate
Once the VoiceHotKey keyboard is on screen, look for the microphone button in the top-right corner of the suggestion strip, just above the letters. That’s the dictation trigger — tap it once to start recording.
iOS opens VoiceHotKey full-screen with the Speak now prompt:
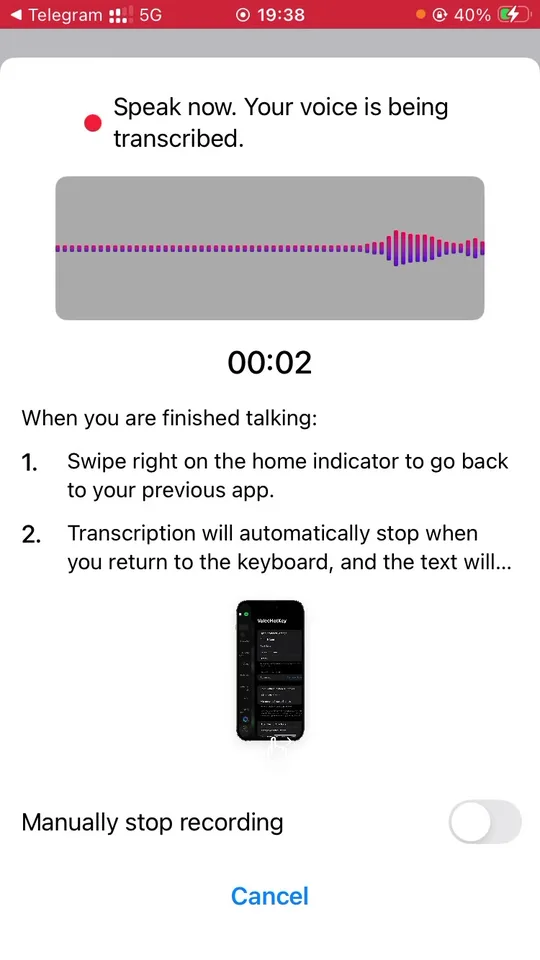
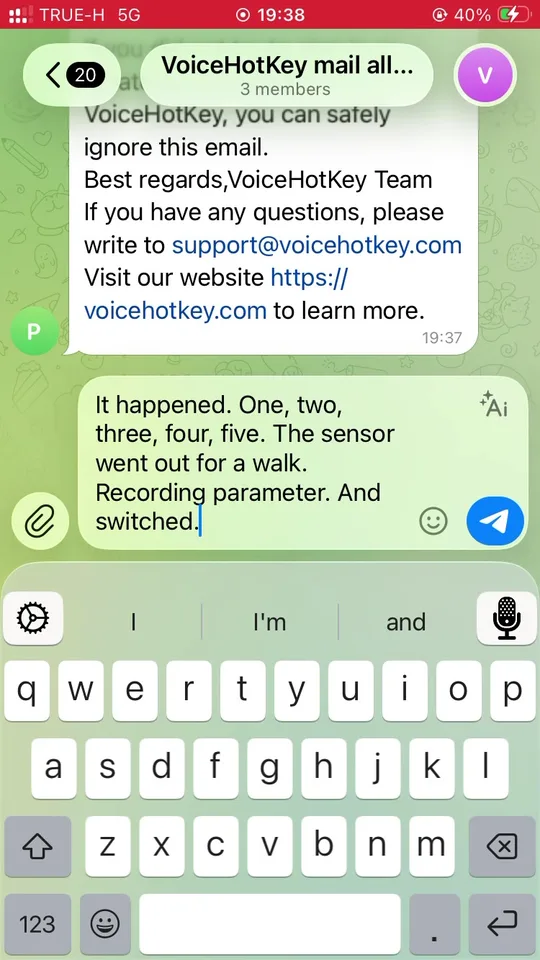
Speak naturally. When you’re done, swipe right on the home indicator to return to the previous app — transcription stops automatically & the text appears in the field you were typing in.
By default the recording stops on its own when you switch back. To stop manually instead, turn on Manually stop recording in the VoiceHotKey settings.
8. Other settings
Each lives in its own dedicated menu in the VoiceHotKey app:
- Change record duration — how long a single recording can run before auto-stopping.
- Hide titles for AI actions — compact mode for the AI buttons above the keyboard.
9. Troubleshooting
- The keyboard works but the mic does nothing. Microphone Access is off. Open the VoiceHotKey app & make sure all three status rows are green.
- Mic button is greyed out / no Speak now overlay. Full Access is off. Settings → VoiceHotKey → Keyboards → VoiceHotKey → toggle Allow Full Access on.
- Transcription is in the wrong language. Open Choose Voice to Text Languages & enable the language you want (or disable the ones you don’t).
- Subscription or login problems. Tap Refresh Data at the top of the VoiceHotKey app. If it still misbehaves, tap Report problem.


